

Blue Oyster Organic Mushroom Kit
Blue Oyster Organic Mushroom Kit
Couldn't load pickup availability
Growing Information
- Skill level
- Easy
- Grow location
- Indoors (Grow tent or chamber ideal)
- Growing temp
- Cool (10C - 21C)
- Time to grow
- First flush in 1–2 weeks, with up to 2–3 more possible every few weeks after
- Cooking ideas
- Ideal for searing, grilling, winter soups and braises, and as a plant-based meat alternative
- Shelf life
- Fruit immediately or store in fridge for up to 2 months
What's Included
What's Included
Why Choose Our Kit?
Why Choose Our Kit?
Mushroom Profile
Mushroom Profile
Growing Information
Growing Information
More Growing Information:


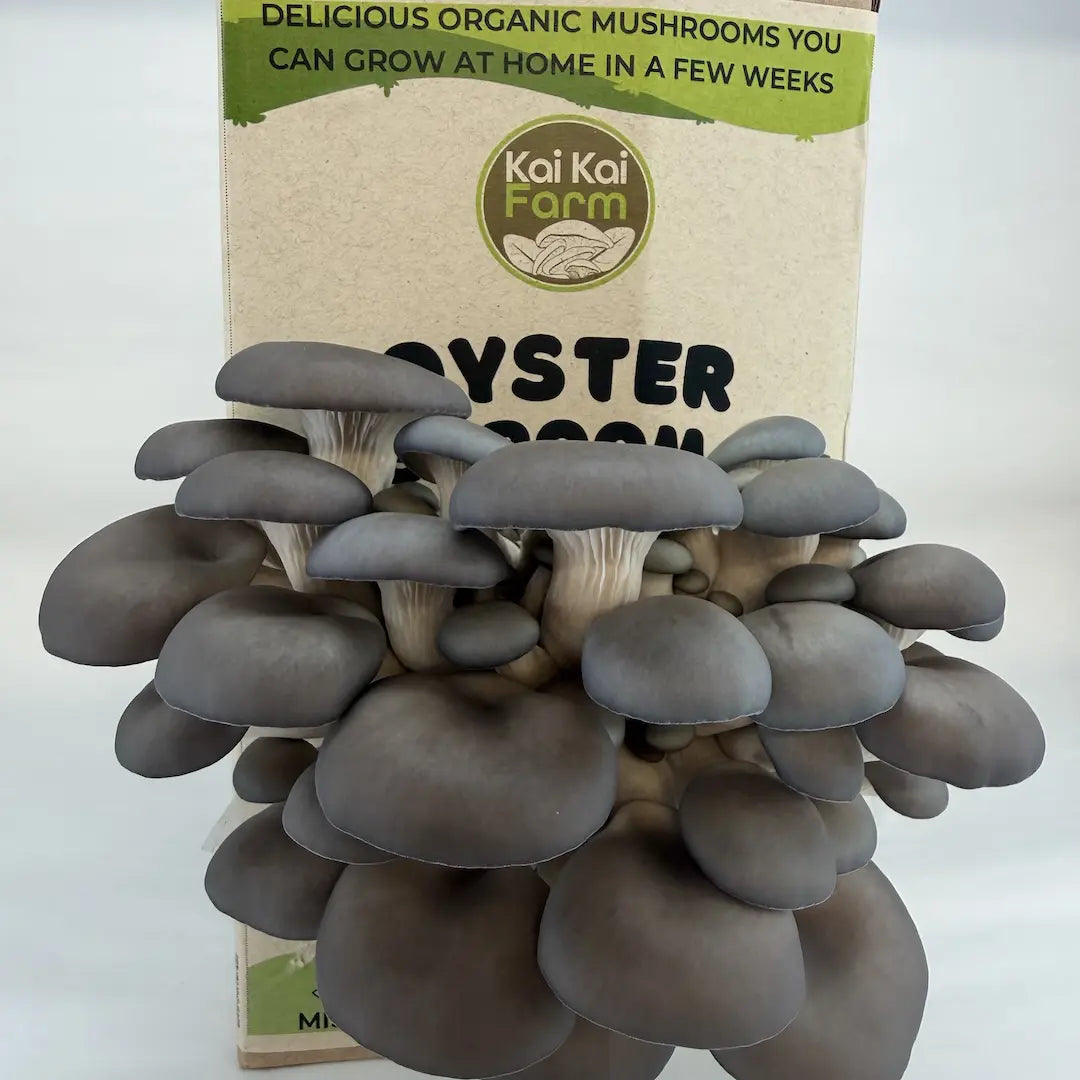
The classic cool-season oyster — steel-blue, meaty, and easy enough for your very first grow.
Blue Oyster (Pleurotus ostreatus var. columbinus) is the oyster commercial growers rely on when the weather turns cool — thick, meaty caps in steel-blue to slate-grey, and a firm, savoury bite that holds its own in the pan. It's also one of the most forgiving mushrooms you can grow, which makes it a genuinely great first kit.
Our Organic Blue Oyster Mushroom Grow Kit is made fresh on our Tamborine Mountain farm using locally grown spawn and organic substrate — no experience, no equipment and no green thumb required. Open the bag, mist twice a day, and you'll have your first harvest within a couple of weeks.
Why Blue Oyster makes a great first kit
Built for first-timers
No experience needed.Everything is pre-mixed, inoculated and fully colonised before it leaves the farm — there's no substrate to prepare and no sterilising. Open the bag, mist it, and let it do the work. Backed by our grow guarantee: if it doesn't fruit, we'll make it right.
Made for the cooler months
Happiest at 12–18°C.Where warm-weather oysters stall as the temperature drops, Blue Oyster keeps pinning and fruiting cleanly. It's the kit to grow through autumn, winter and early spring — and the cooler it's kept, the deeper its blue colouring.
Thick, meaty caps
A mushroom you can sear.Blue Oyster caps are noticeably denser than Pearl's, with a firmer bite and deeper savoury flavour. They hold their shape under a hot pan or grill — a favourite for plant-based mains and anyone who wants a mushroom with some substance.
Made fresh on our farm
Not imported. Not warehouse stock.Every kit is inoculated with locally grown spawn on organic substrate right here at Kai Kai Farm, then packed to order. What arrives is genuinely live and ready to fruit — not something that's been sitting in a box for weeks.
What you'll notice
- Small blue-black pins pushing through within 5–10 days of opening and misting the bag
- Chunky clusters of thick, steel-blue caps that soften to slate-grey as they mature
- Deeper, richer blue colouring when the kit is kept somewhere cool
- Multiple harvests from one kit — rest it for a week and it'll flush again
- Firm, savoury mushrooms that sear, grill and braise better than anything from a supermarket punnet
Why the kit is already doing the hard part: Your substrate is a blend of hardwood, organic wheat bran and gypsum, inoculated with our own Blue Oyster spawn and fully colonised before it ever leaves the farm. The hardwood gives the mycelium the cellulose and lignin oysters evolved to digest, while the wheat bran adds the nitrogen that fuels dense growth. Colonisation is the slow, technical part of mushroom growing — by the time the kit reaches you, it's done. All that's left is air, light and moisture.
Why Blue Oyster loves the cold: The columbinus variety is a cool-adapted oyster — it pins and forms proper, well-shaped caps at temperatures that make warm-weather strains stall or grow long and spindly. Cooler conditions also slow cap development, which is what gives Blue Oyster its deeper blue colouring and denser flesh. Kept warmer, it still fruits, but caps come out paler and thinner.
Growing your kit
Open it → mist it twice a day → harvest → rest → repeat
In the kitchen
Blue Oyster is the heartiest oyster in the kit range. The flesh is thick and firm, the flavour savoury and gently earthy, and some cooks pick up a faint seafood note when it's seared hot in butter. It's best cooked rather than eaten raw — and unlike delicate oysters that collapse in the pan, Blue Oyster holds its shape under high heat, on the grill, or through a long braise. Tear it rather than slice it for more crispy edges.
Three ways to cook it
Pressed sear
Hot pan, a little oil, then press whole clusters flat with a heavy pan or spatula for 3–4 minutes a side. You get deeply browned, crispy "mushroom steaks" with a tender centre.
Grill or barbecue
Brush with oil, garlic and a splash of soy, then grill over high heat until charred at the edges. Thick caps won't fall through the grates or dry out.
Soups, stews and braises
Brown first, then add to winter soups, risottos, ragùs or curries. The dense flesh stays meaty through slow cooking and soaks up flavour.
Good to know
Pairs well with garlic, thyme, butter, miso, soy, chilli and smoked paprika. It's a natural stand-in for meat in tacos, pulled "pork" and stir-fries.
Common mistakes to avoid
- Rinsing them under running water — wipe or brush off any substrate instead, as they soak up moisture and won't brown
- Overcrowding the pan — they steam instead of browning, and you lose the crisp edges
- Keeping the tough base — trim the woody point where the cluster joined the bag
- Eating them raw — cook first, always, for both flavour and digestibility
🍳 The 5-minute way to try your first harvest
Tear the cluster into large pieces, pat dry, and lay them in a hot pan with a little oil. Press down and leave them undisturbed for 3 minutes until deeply golden, flip, add a knob of butter and a crushed garlic clove, and cook another 2 minutes. Finish with salt and a squeeze of lemon — the simplest way to taste exactly what you grew.
Storage & handling
Perfect for
What's inside the kit
No fillers, no additives, nothing imported — just organic substrate and mycelium, packed to order on our farm.
More grow kits
The Kai Kai Farm story
Kai Kai Farm is a family operation on Tamborine Mountain in Queensland's Scenic Rim. We grow gourmet mushrooms commercially, and our grow kits are made from the very same locally grown spawn and organic substrate we use in our own production — just packaged for a kitchen bench instead of a grow room.
We're growers, not resellers. Every kit is packed to order here on the mountain — not imported, not sitting in a warehouse — so what arrives at your door is genuinely fresh and ready to fruit.
Blue Oyster is the variety we lean on every cool season. It's reliable, generous and forgiving — exactly what we want your first mushroom grow to be.


